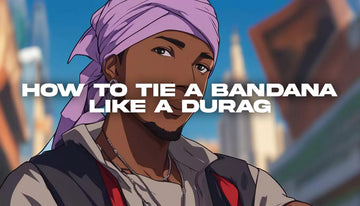
Knowing how to tie a durag properly is essential for fit and style. Whether you're looking to achieve 360 waves or maintain your hairstyle, a durag can be a valuable accessory in your hair care routine. Here, we'll provide a step-by-step tutorial on how to tie a durag, along with tips and tricks for achieving the best results.
Before we dive into the tutorial, let's explore some background information on durags. A durag is a piece of cloth worn on the head to compress hair, protect it from damage, and promote wave development. It is typically made of a silky or stretchy material and comes in various colors and styles.
Now, let's get started with the tutorial!
Why Should You Wear a Durag?
If you're looking to achieve the intricate waves hairstyle, a silky durag is an essential accessory. The 360 waves method involves training your hair to lie in a spiral pattern, creating waves around your head. But achieving this look takes time and effort, and a durag can help ensure that all your hard work doesn't go to waste.
Just like wave caps, wearing a durag can help enhance your wave pattern by compressing your hair and keeping it in place while you sleep or go about your day. The durag helps protect your hair from friction that can cause breakage and split ends. With consistent use, a durag can promote wave development and help you get the waviest waves on your head.
But waves and other hair patterns are not the only benefits of wearing a durag. It is also a stylish accessory that adds a unique touch to your look. Worn alone or under a hat, a durag can elevate your style and give you a cool, edgy vibe.
So, whether you want to get braids or add a bit of flair to your everyday style, a durag is an accessory you don't want to overlook.

Key Takeaways:
- Tying a durag properly is important for both fit and style.
- A durag can be a valuable accessory in your hair care routine.
- Durags are made of a silky or stretchy material and come in various colors and styles.
How to Chose the Right Durag
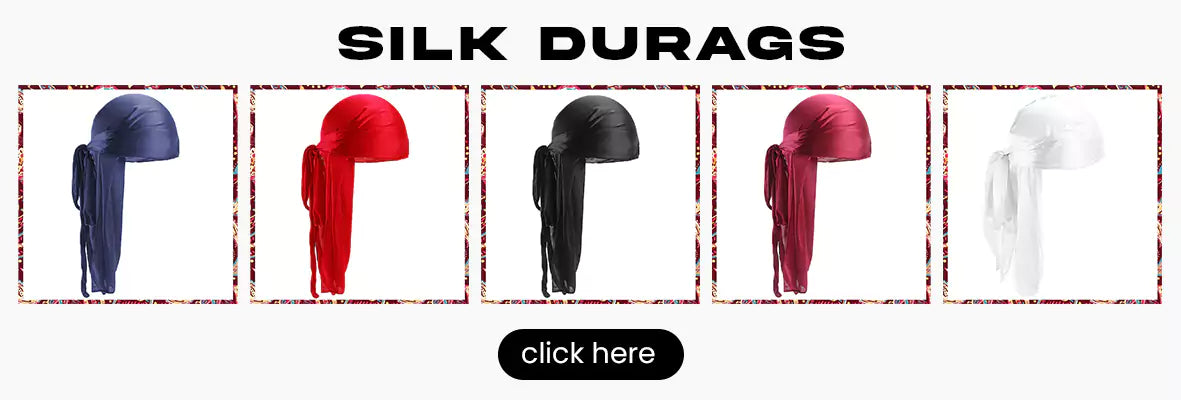
When it comes to selecting the ideal doo rag, it's crucial to consider your hair texture. If you have coarse hair, opt for a durag made from materials such as velvet or silk to help maintain your hair's moisture. On the other hand, if you have medium hair, a thinner durag made from nylon or polyester may work well for you. You'll find what you're looking for in our silk durags collection!
Before putting on your durag, turn it inside out to avoid creases or folds affecting your hair. Place the durag on your head with the flap at the back, then pull the ties to the front of your head and cross them over. Bring the ties back around your head and tie the knot tightly, ensuring it sits comfortably behind your head without being too tight.
For a more secure fit, tuck the flap under the knot or fold it to prevent the durag from slipping. Ensuring the durag is not too tight is crucial, as it can cause discomfort and even lead to hair loss. By choosing the right durag and putting it on correctly, you can enjoy the benefits of a sleek and stylish hairstyle.

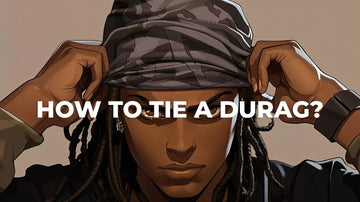
Step-by-Step Guide to Tying a Durag
Now that you have chosen the perfect durag, it's time to learn how to tie it correctly. Follow these simple steps to ensure a secure and comfortable fit.
- Place the durag on your head with the flap facing downwards and the center seam at the back.
- Take the two ties and cross them behind your head.
- Bring the ties to the front of your head and tie a knot in the center. Ensure the knot is snug but not too tight to cause discomfort.
- Tuck the flap under the knot towards the back of your head.
- Prevent the durag from slipping by adjusting the ties and tucking in any excess fabric.
If you prefer to tie your durag at the front of your head, simply follow the same steps but tie the knot at the front instead.
For a visual guide, check out this helpful transcript:
"First off, you’re gonna put the durag on your head. Remember, the flap is facing downwards and the center seam is at the back. Take the ties and cross them behind your head. Bring them to the front, tie a knot in the center, not too loose, not too tight. Tuck the flap underneath the knot towards the back of your head. And that’s it."
For extra security, tuck in any excess fabric at the sides and back of your head. With these easy steps, you can tie a durag like a pro in no time.
Tips for Achieving the Best Results
Now that you know how to tie a durag, it's time to take your wave game to the next level. Whether you're aiming for silky 360 waves or experimenting with different wave patterns, some tips and techniques can help you achieve the best results.
First and foremost, practice makes perfect. The more you tie your durag and experiment with different techniques, the better you'll become at creating the wave pattern you desire. Don't be afraid to try new things and adjust your technique as needed.
If you're struggling to get your waves to show up, consider revealing his technique for tying a durag. Sometimes, a slight adjustment in your technique can make all the difference. Another way to help your waves appear is by wearing your durag consistently. The durag can help to train your hair to form the desired wave pattern.
Choosing the right durag for your hair type and level of compression is also important. You may need a thicker and more tightly compressed durag if you have coarse hair. A less tightly compressed durag may be more suitable if you have medium hair. Always turn the durag inside out before putting it on, and tie the knot behind your head for the best results.
Tuck the flap in securely and adjust the knot as needed to prevent the durag from slipping off while you sleep or go about your day. You can also use a 360-wave brush to help enhance your waves and keep them looking sharp.
With a little patience and practice, you can achieve the waviest waves on your head. What's up wavers? It's time to get tying!
Maintaining Your Durag and Hair
Proper maintenance of your durag and hair is essential to achieve the best results for your waves. Numerous online resources are available, including YouTube channels and hair care websites dedicated to teaching wavers about the best hair care practices. These resources have a wealth of information on various hair care topics to help you improve the look and feel of your hair.
When it comes to maintaining your durag, it's essential to wash it regularly to prevent oil buildup and maintain its elasticity. Use mild detergent and air dry the durag to avoid shrinking. 360 wave brushes can also help you maintain your durag by keeping your waves in top shape. Brush your hair in the direction of your waves and avoid brushing too hard to prevent damage to the hair.

In addition to regular washing and brushing, natural hair care products can also help you maintain your waves. Look for products free of harsh chemicals, including natural ingredients such as coconut oil, shea butter, or aloe vera. These ingredients can help to moisturize and nourish your hair, improving its health and appearance.
| Resources | Description |
|---|---|
| YouTube Channels | YouTube channels are dedicated to teaching individuals how to achieve and maintain waves. |
| Hair Care Websites | Websites that offer advice and information on hair care techniques specifically for wave enthusiasts. |
| 360 Wave Brushes | Brushes are designed to help maintain wave patterns and promote hair growth. |
| Natural Hair Products | Hair care products are made from natural ingredients free of harsh chemicals and can promote healthy hair growth. |
By incorporating these tips and resources into your hair care routine, you can achieve and maintain the waviest and healthiest hair possible, all with the help of your trusty durag.
Taking Your Wave Game to the Next Level
Congratulations! You've mastered the art of tying a durag and achieved those sought-after braids. But why stop there? If you're ready to take your wave game up a notch, it's time to experiment with more complex patterns.
One popular progression is 180 waves, which involve shifting the wave pattern towards the front of the head. This can be achieved by tying the durag to cover the forehead and placing more emphasis on the front of the hair. To achieve 540 waves, you'll need to twist and turn your hair in a specific manner. To achieve 720 waves, you'll need to repeat this twisting and turning motion twice.
As you experiment with these more complex patterns, it's important to remember that they require increased maintenance. You'll need to brush your hair more often, adjust your sleeping position, or wear a durag more frequently to maintain the desired pattern.
But don't let the extra effort discourage you. You can achieve any wave pattern you desire with a little practice and patience. So try out those 180, 540, or even 720 waves and show off your unique style.

Tips for Resolving Common Problems
While wearing a durag can significantly improve your waves and overall hairstyle, you may encounter some common issues. Let's take a look at some troubleshooting tips for these problems.
Durag Slipping Off
If your durag keeps slipping off, it may be due to incorrect tying or improper fit. Try retying your durag, tying it tightly enough to stay in place but not too tight that it causes discomfort. You may also need to adjust the positioning of your durag to find the optimal fit for your head shape.
Discomfort While Wearing
If you experience discomfort while wearing a durag, it may be due to tying it too tightly or the type of durag you use. Make sure to tie your durag snugly but flexibly to avoid over-compression. If your durag is too tight, consider purchasing a larger size or a different type of durag specifically designed for your hair type.
Incorrect Wave Pattern
If you are not achieving the desired wave pattern with your durag, it may be due to tying it incorrectly or not wearing it long enough. Follow the step-by-step guide in this article and experiment with different tying techniques to find the best fit for your hair. Additionally, be patient and consistent with wearing your durag, as it may take time for the waves to form.
Remember, every individual has unique hair characteristics and may require trial and error to find the best practices for tying a durag. Using the tips and techniques outlined in this article, you can troubleshoot common issues and achieve the best results for your waves and overall hairstyle.

Conclusion
Congratulations! You have successfully learned how to tie a durag and gained valuable insights into the benefits of wearing one. Remember, choosing the right type of durag and maintaining healthy hair care practices are essential for achieving optimal results.
Don't be afraid to experiment with different tying techniques and products, such as 360 wave brushes and natural hair products, to take your wave game to the next level.
If you encounter any issues, such as slipping or discomfort, refer to our troubleshooting section for solutions tailored to your hair type.
We hope this tutorial has been informative and helpful. Keep practicing and maintaining healthy hair; soon, you'll have the waviest waves on the block.
FAQ
Q: How important is it to tie a durag properly?
A: Tying a durag properly is essential for both fit and style. It ensures the durag stays in place, providing maximum compression and protection for your hair.
Q: What are the benefits of wearing a durag?
A: Wearing a durag helps enhance wave patterns, protect the hair, and promote wave development. It is especially beneficial for individuals looking to achieve 360 waves or maintain their hairstyle.
Q: How do I choose the right durag?
A: When choosing a durag, consider your hair type and desired compression level. It's important to turn the durag inside out before wearing it and learn to put it on correctly for best results.
Q: Can you provide a step-by-step guide on tying a durag?
A: Certainly! Here is a step-by-step tutorial on how to tie a durag: place the durag on your head, tie the knot at the back or front of your head, and tuck the flap to secure it in place.
Q: Do you have any tips for achieving the best results?
A: Absolutely! To achieve the best results, experiment with different techniques, create different wave patterns, and consider the frequency of wearing a durag. Additionally, utilizing certain products or steps can enhance your outcome.
Q: How do I maintain my durag and hair?
A: It is important to maintain both your durag and hair. Seek resources like online YouTube channels and websites dedicated to teaching wave enthusiasts. You can also use 360 wave brushes and natural hair products to keep your hair and durag in excellent condition.
Q: How can I take my wave game to the next level?
A: If you're ready to advance your wave patterns, you can progress to more complex styles such as 180 waves, 540 waves, or 720 waves. Just be aware that these styles require additional steps and maintenance.
Q: What should I do if I encounter common issues when tying a durag?
A: If you experience slipping or discomfort while wearing a durag, try adjusting the fit and tension. Solutions may vary depending on your hair type and texture.