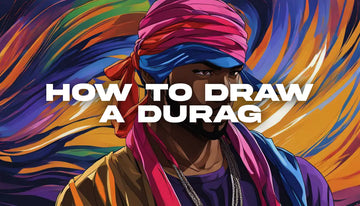
Are you interested in learning how to draw a durag? Whether you're a seasoned artist or a beginner, our step-by-step durag drawing tutorial will easily guide you through the process. With helpful tips and techniques, you can create your own unique durag artwork in no time.
Our tutorial is designed to be easy to follow and perfect for anyone who wants to learn how to draw a durag. You'll need a few basic materials, including a pencil or pen, paper or sketchbook, and an eraser. If you prefer to add color to your artwork, you can also use markers or colored pencils.
With our step-by-step durag drawing tutorial, you can create your own durag artwork. So, grab your materials, and let's get started!
Materials Needed for Durag Drawing
Before you begin to draw a durag, gather the necessary materials. You'll need a pencil or pen, paper or sketchbook, eraser, and any additional coloring tools you prefer, such as markers or colored pencils. These materials make it easy to sketch durag designs and experiment with different durag sketching techniques.
When choosing your materials, consider the quality of your paper or sketchbook. Higher quality paper will hold up better against erasing and coloring. Additionally, if you plan on creating digital durag art, you may need a drawing tablet or other digital drawing tools.

Materials Needed for Durag Drawing:
| Materials | Description |
|---|---|
| Pencil or Pen | Used for sketching the basic shape of the durag and adding details |
| Paper or Sketchbook | Provides a surface to sketch on, and sketchbooks keep all your drawings together in one place |
| Eraser | Used for correcting mistakes and refining your drawing |
| Coloring Tools | Markers or colored pencils are used to add color and depth to your durag drawing |
| Drawing Tablet (Optional) | Required for digital durag art. Allows artists to create digital durag designs using a stylus |
Sketching the Basic Shape of the Durag
Now that you have your materials ready, it's time to start sketching the basic shape of the durag. This beginner-friendly guide will help you create a realistic outline of the headwear. Take your pencil or pen and follow the steps below:
- Start by drawing a horizontal line across your paper or sketchbook. This will be the base of your durag.
- Draw two diagonal lines that meet at the top of the horizontal line. This will form the top of the durag.
- Draw two slightly curved diagonal lines that connect the top of the durag to the horizontal line. These lines will create the pointed shape of the durag.
- Now it's time to add the folds and contours. Draw two curved lines from the top of the durag to the base, creating the shape of the band around the head.
- Draw some curved lines that follow the shape of the durag to add a realistic texture.
Don't worry if your sketch doesn't look perfect right away. Drawing takes practice; the more you do it, the better you'll become. You can watch this YouTube tutorial on durag art lessons if you need more guidance. Soon, you'll create realistic durag drawings!
Adding Details and Patterns to the Durag
Now that you have the basic shape of the durag, it's time to add some style! This is where you can let your creativity shine.
You can use reference images for inspiration or create your own unique designs. When adding patterns to your durag, pay attention to the direction and alignment of the folds to create a realistic look.
Shading and highlighting are important techniques to create depth and dimension in your durag drawing. Use your pencil or pen to create darker shadows in the creases and folds of the durag and lighter areas on the raised surfaces.
To create different textures, experiment with different pencil strokes. For example, a crosshatch technique can create a woven or knitted texture, while small circular strokes create a more textured look.
Remember to take your time and be patient with yourself. Durag drawing is a skill that takes practice to perfect. Don't be afraid to make mistakes - they can often lead to happy accidents and unexpected results.
TIP: If you're struggling with design ideas, look at different fabrics and patterns for inspiration. You can also try experimenting with different color schemes to make your durag artwork truly unique.
Coloring and Final Touches
Now that you have finished sketching and adding details to your durag drawing, it's time to bring it to life with color. Whether you prefer traditional mediums like colored pencils or markers o, the process is similar, and we'll guide you through it.
If you're drawing traditionally, lightly sketch the colors you want. If using markers or colored pencils, start with the lightest shade and gradually build up to the darker ones. Experiment with blending techniques to create a smooth transition between colors.
If creating a digital durag drawing, use your software's color palette or select colors from an image referencing a real durag. Experiment with layering and opacity to create different effects.
As you add color, remember to pay attention to lighting and shading. Consider where the light source comes from and how that affects the shadows and highlights on the durag. Don't be afraid to add highlight and texture to make your artwork pop.
Finally, add any final touches to your durag drawing, such as signature or date. Step back and admire your creation - you did it!

Practice makes perfect, so experiment with different techniques and materials to hone your durag art skills. With patience and practice, you'll create stunning durag artwork in no time!
Conclusion
Congratulations! You have successfully completed our step-by-step guide on how to draw a durag. With the techniques and tips we've provided, you're on your way to creating stunning durag artwork.
Remember, practicing regularly and experimenting with different techniques is the key to improving your skills. Don't be afraid to make mistakes; they can often lead to new discoveries and more unique and interesting artwork.
You can create a durag drawing that truly stands out by incorporating shading, highlighting, and different textures. And with the addition of color, your artwork can come to life.
Best Durag Drawing Techniques
Some of the best durag drawing techniques include paying close attention to the folds and contours of the durag, experimenting with different patterns and designs, and practicing shading and highlighting techniques to add depth and dimension to your artwork.
Try using different materials, such as markers or colored pencils, to add a pop of color to your durag drawing. And don't forget to add those final touches to make your artwork truly unique and personalized.
Durag Art Lessons
If you want to improve your durag drawing skills further, consider taking art lessons or attending workshops. This can be a great way to get feedback and guidance from experienced artists and connect with other artists who share your passion for creating durag art.
Plenty of online resources are available, including tutorials, blogs, and forums, where you can learn new techniques and get inspiration for your own durag artwork. So keep practicing, keep experimenting, and keep creating! The possibilities are endless.
FAQ
Q: How long does it take to learn to draw a durag?
A: The time it takes to learn how to draw a durag will vary depending on your skill level and practice. With dedication and regular practice, you can start seeing improvements in your durag drawing within a few weeks or months.
Q: Do I need to have prior drawing experience?
A: No, you do not need prior drawing experience to learn how to draw a durag. Our step-by-step guide is designed for artists of all skill levels, including beginners. Just follow the instructions and enjoy the process!
Q: Can I use different coloring tools for my durag drawing?
A: Absolutely! You can choose which coloring tools you prefer for your durag drawing. Whether it's markers, colored pencils, or even digital tools, the choice is yours. Experiment with different materials to find the ones that work best for you.
Q: Can I create my own unique durag designs?
A: Yes, you can create your own unique durag designs. While we provide step-by-step instructions, let your imagination run wild and add your personal touch to the artwork. Explore different patterns, textures, and color combinations to make your durag drawing one-of-a-kind.
Q: How can I improve my shading and highlighting techniques?
A: Improving shading and highlighting techniques takes practice. Start by observing real-life objects and pay attention to how light interacts with them. Practice creating different gradients and experimenting with the intensity of light and shadows. With time and patience, your shading and highlighting skills will improve.


